
Campaigns Overview
This is an overview of the 'Campaigns' tab in WP Indexer. You'll want to read this to get an idea of how the external url feature works, and how it's managed by the campaigns tab.
If you add url's into campaigns - then set up a cronjob, Indexer will help index and check all the url's until they're in Google's index. You'll be able to check at any time the percentage of each campaign that's indexed, not indexed, or not yet checked. Also you'll see at the top a pie chart for overall figures from all your campaigns.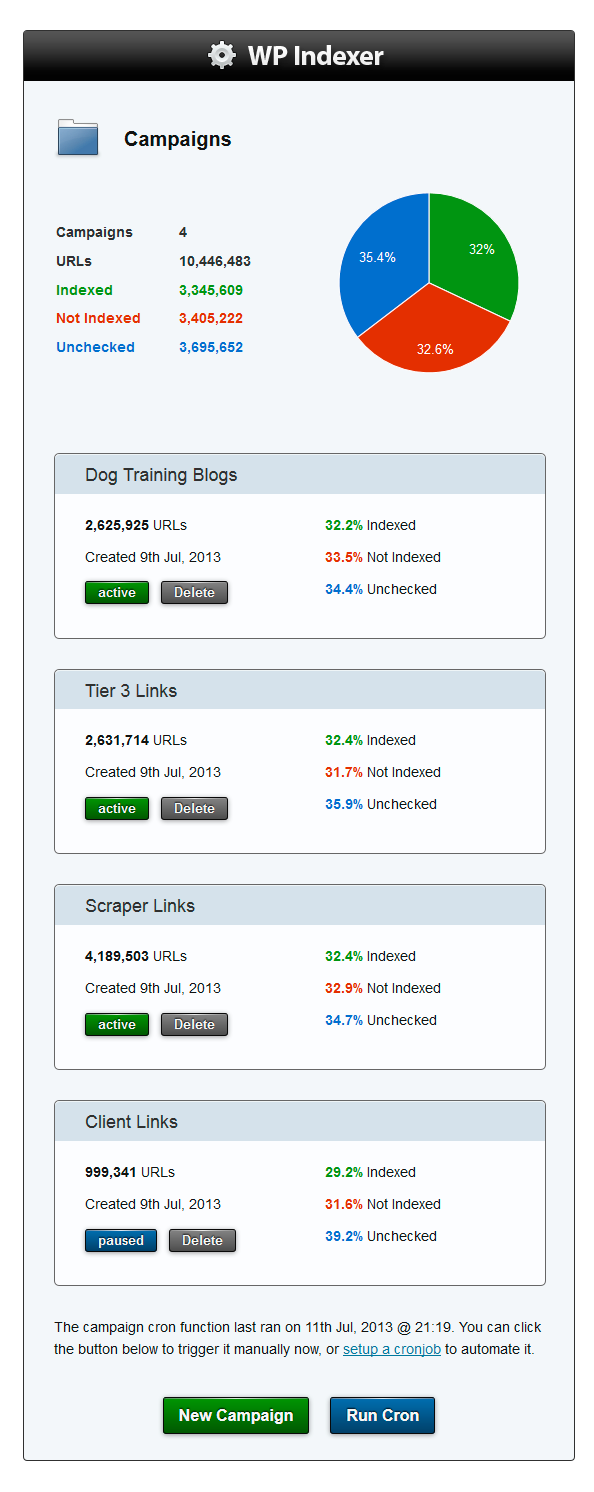
Adding Campaigns
When you click on the 'new campaign' button, a new area will slide down. In this area, name your campaign and enter your URL's.
- Make sure you enter 'http://' before the domain when adding
- Name the campaign so that you can know at a glance which url's are in that campaign (Tier 2 links, mysite backlinks, client links etc)
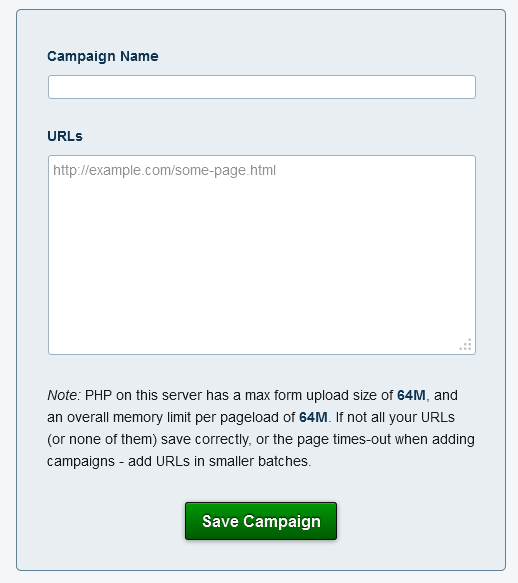
The area below displays your servers maximum PHP upload settings - if you find entering a number of url's it doesn't add a campaign properly, try entering a lower number of url's. This number is Megabytes, and the information is taken straight from your php.ini file.
Once you've entered your domains and named the campaign, click save and it should create a campaign for you.
If you click save and nothing happens, this could be the following reasons:
- You haven't entered 'http://' before the domains.
- You are trying to upload more than your server will allow at once, try to split the url's into smaller batches (tier 2(1), tier 2(2) etc)
- The database tables may have not been created properly, try de-activating WP Indexer and re-activating in the plugins menu.
CronJob
You can run the cron by clicking the button - but you'll want this to be done automatically:
Indexer's external url feature doesn't use wp-cron (the regular cron function that wordpress automatically handles), so you'll need to set up a Cron Job on your server. To do this you'll need access to your cpanel (or equivalent).
To start with, you'll need to get the command you'll need to use - this can be found in the plugin by clicking the 'setup a cronjob' button. 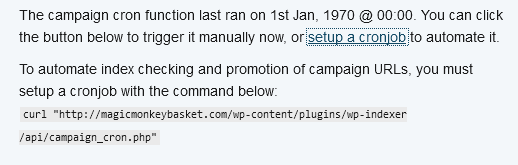
Open your cpanel (Or account manager etc), click on CronJobs. The example below is what Go-daddy would look like if you set a cron up for every 30 mins.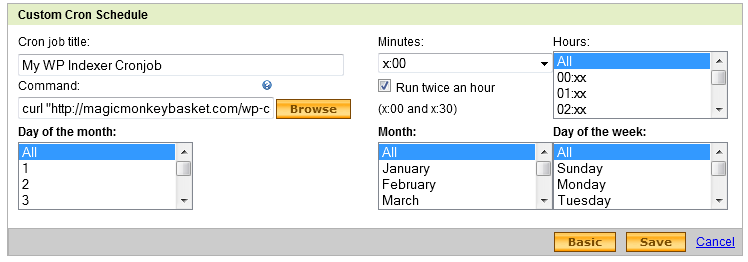
- Copy the command from the plugin
- Setup a new cron running ideally every 10 minutes.
- Make sure, if you can, to make sure it won't send you an email each time - or you'll get 144 emails a day.
Once the cron is set up - all you need to do is check back every now and then to see the progress.
A Few Things To Keep In Mind...
- Once a campaign is 100% indexed, it will disappear from the Campaigns menu.
- It's advisable to have a few proxies entered, or you may find that Google rate-limits your IP if you've entered a lot of url's.
- All items in the log which relate to a campaign, will be prefixed with '[campaign]'
- When Indexer finds a URL that doesn't exist in the list, when it checks it for the first time, it will remove it from that campaign - so your number of url's may decrease a little.